CS2 Zenith Plugins
Enhance your server management with Zenith Plugins, offering powerful tools to manage punishments, display player ranks, and much more.
To use Zenith Plugins, download them from the official GitHub repository and follow the installation instructions provided.
Ranks System
The K4 Zenith Ranks Interface provides a sleek, user-friendly way for players to view their ranks and additional stats.
How to Enable the Ranks System
- Enter your Steam API Key in Integrations > Steam.
- Ensure you're using the latest version of the GameCMS CS2 Plugin. For more details, see the GameCMS CS2 Plugin Documentation.
- Add the Zenith Leaderboards interface from Integrations > Counter Strike 2 > Plugins.
- Select Add New Plugin to configure the
Zenith Leaderboards.
Integration Settings
Adjust the following settings for the K4 System plugin on your website:
- Activation: Choose whether to enable this interface on your site.
- Use Global MySQL Server: Default is yes. If set to no, choose a MySQL server from Integrations > Counter-Strike 2.
- Table Prefix: Enter the prefix if your K4 system uses one.
- Name in Website Menu: Customize the menu name to distinguish the K4 System when multiple plugins are installed.
- Link to the Page: Set a unique link for the K4 System plugin interface.
Plugin Settings
Configure the following settings specific to the K4 System plugin:
- Limit First Top: Define how many top users to display (minimum 1).
- Show Top Used Weapons: Enable this to display players' most-used weapons.
- Show Top Used Weapons Limits: Limit the number of displayed weapons (max 50).
- Top Used Weapons Sort By: Set sorting options for the top-used weapons.
- Show Top Played Maps: Enable this to display the most-played maps.
- Show Top Played Maps Limits: Limit how many maps to display.
- Top Played Maps Sort By: Define sorting options for top-played maps.
- Display Faceit Level: Enable this option to show Faceit levels for players.
- Select CS2 Server: Choose the CS2 server to link with the K4 System interface.
Faceit Level Integration
You can integrate Faceit player data into your website. To set this up, generate an API key from developers.faceit.com. After obtaining the key, update the GameCMSPlugin.json file with the following entry:
You must generate Server side API KEY from faceit developer portal.
{
  "FaceitToken": "your_generated_token"
}
Rank Images
To display rank images, configure them in your ranks.jsonc file. Here's an example setup:
"Global Elite": {
    "Name": "Global Elite",
    "Point": 9300,
    "Color": "lightred",
    "Image": "imgur.com/1G3x6fe.png"  <-- Ensure the key is "Image" and is case-sensitive.
}
The key must be case-sensitive. Use only the image path (e.g., imgur.com/1G3x6fe.png) without https:// or http://.
You can host your images on platforms like Imgur or any other reliable image hosting service. Feel free to select images from this Imgur gallery or upload your own to suit your needs.
Any changes made in ranks.jsonc must be synced with your website.
To do so:
- Go to Integrations > Counter-Strike 2 > Plugins.
- Click Edit on your
Zenith Leaderboardsplugin integration. - Click Save! If the GameCMS Plugin is connected successfully, changes will sync within 1 minute.
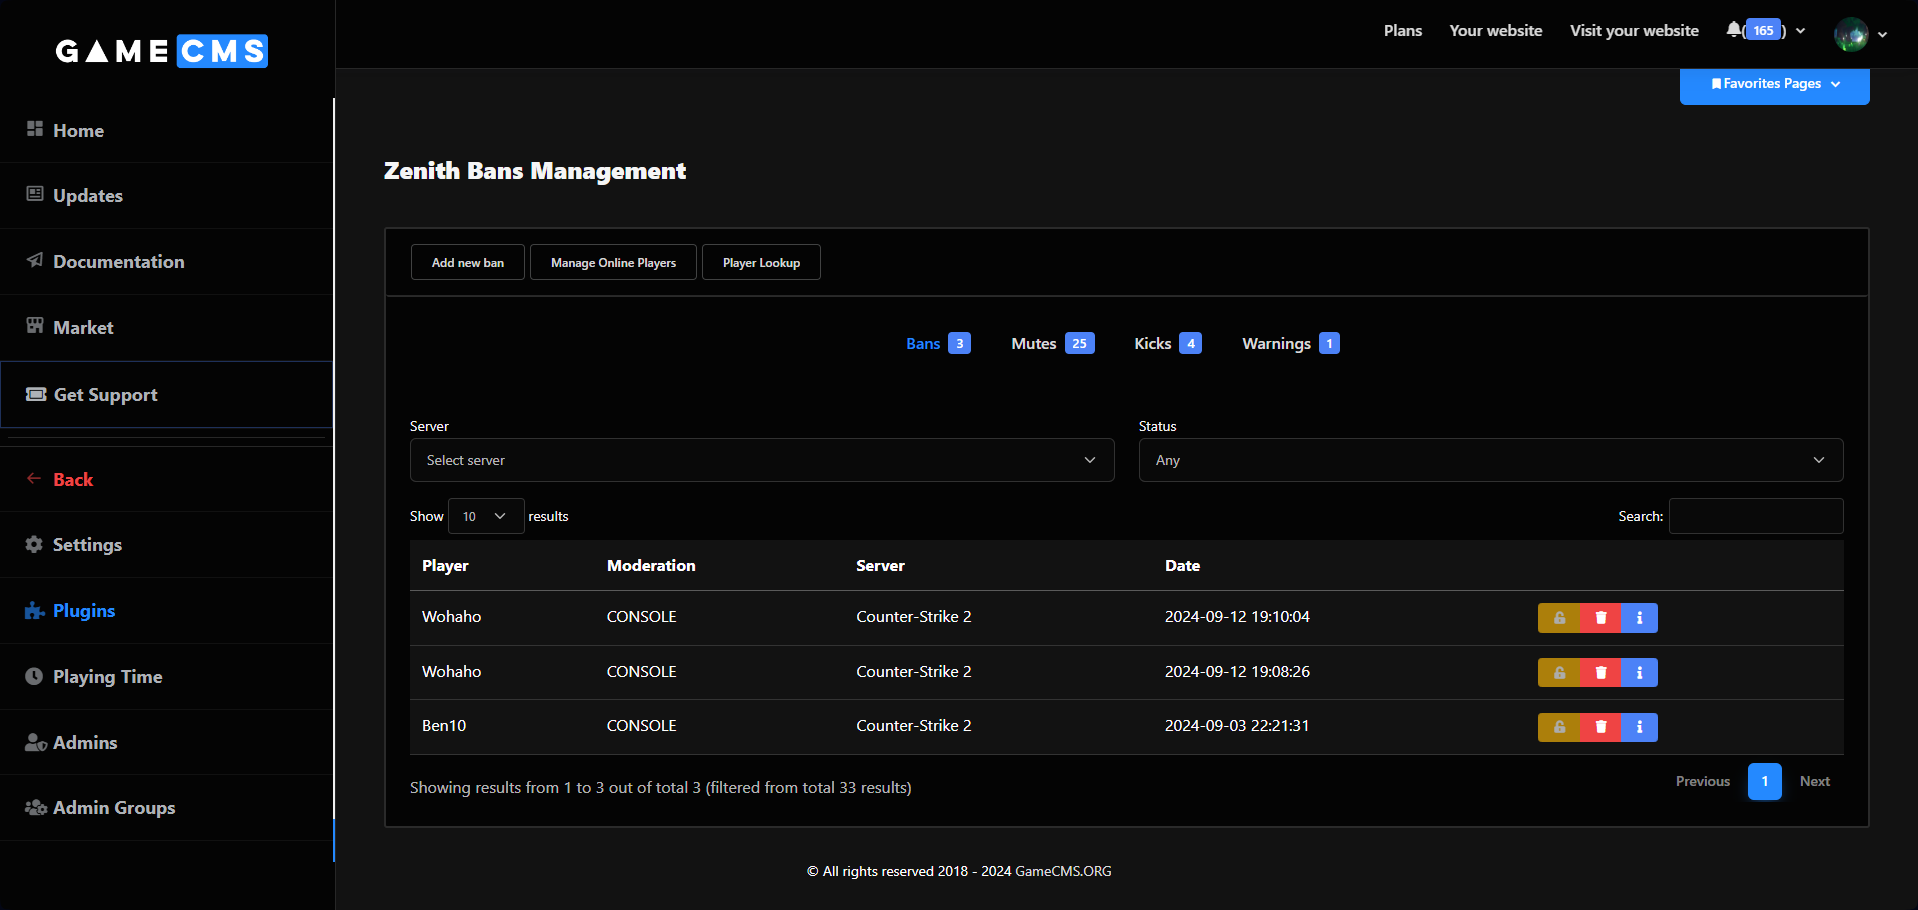
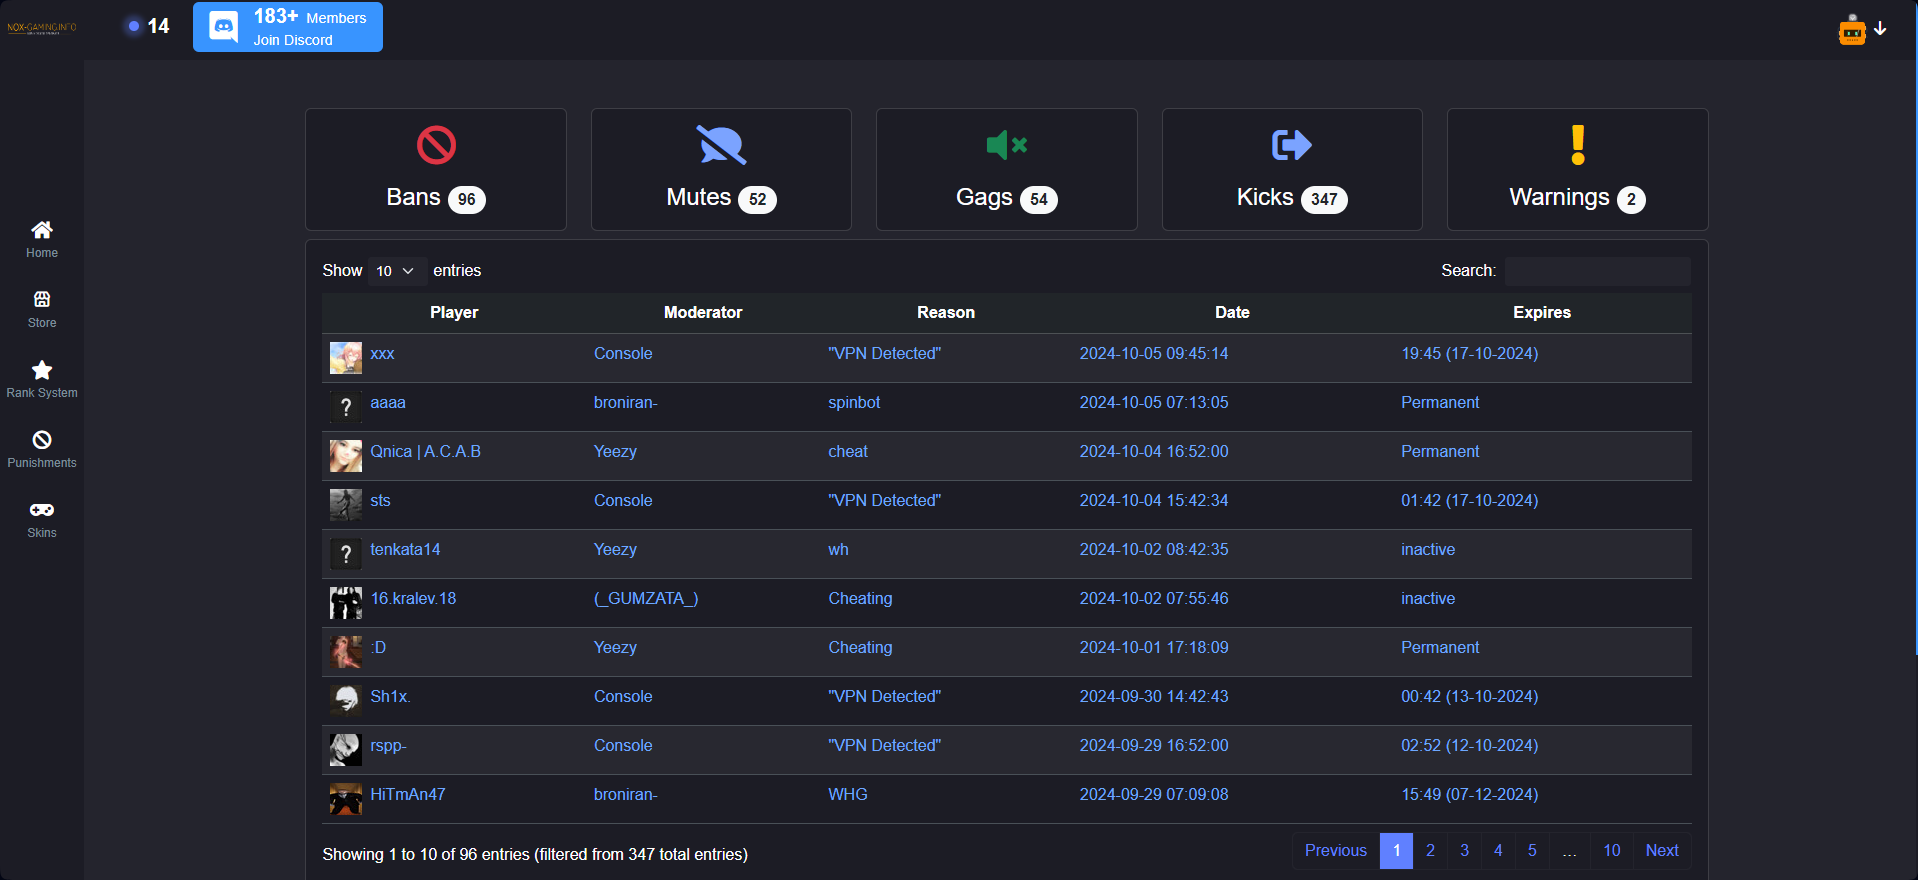
Bans System
Manage bans, mutes, gags, kicks, and more with the Zenith Bans Plugin.
How to Enable the Bans System
- Enter your Steam API Key in Integrations > Steam.
- Ensure you're using the latest version of the GameCMS CS2 Plugin. For more details, visit the GameCMS CS2 Plugin Documentation.
- Add the Zenith Bans interface from Integrations > Counter Strike 2 > Plugins.
- Select Add New Plugin to configure the
Zenith Bans.
Managing the Plugin
Once added, the page will reload, and you'll see a Manage button. Click it to access the following options:
- Add new ban (if on the ban page).
- Add new mute (if on the mute page).
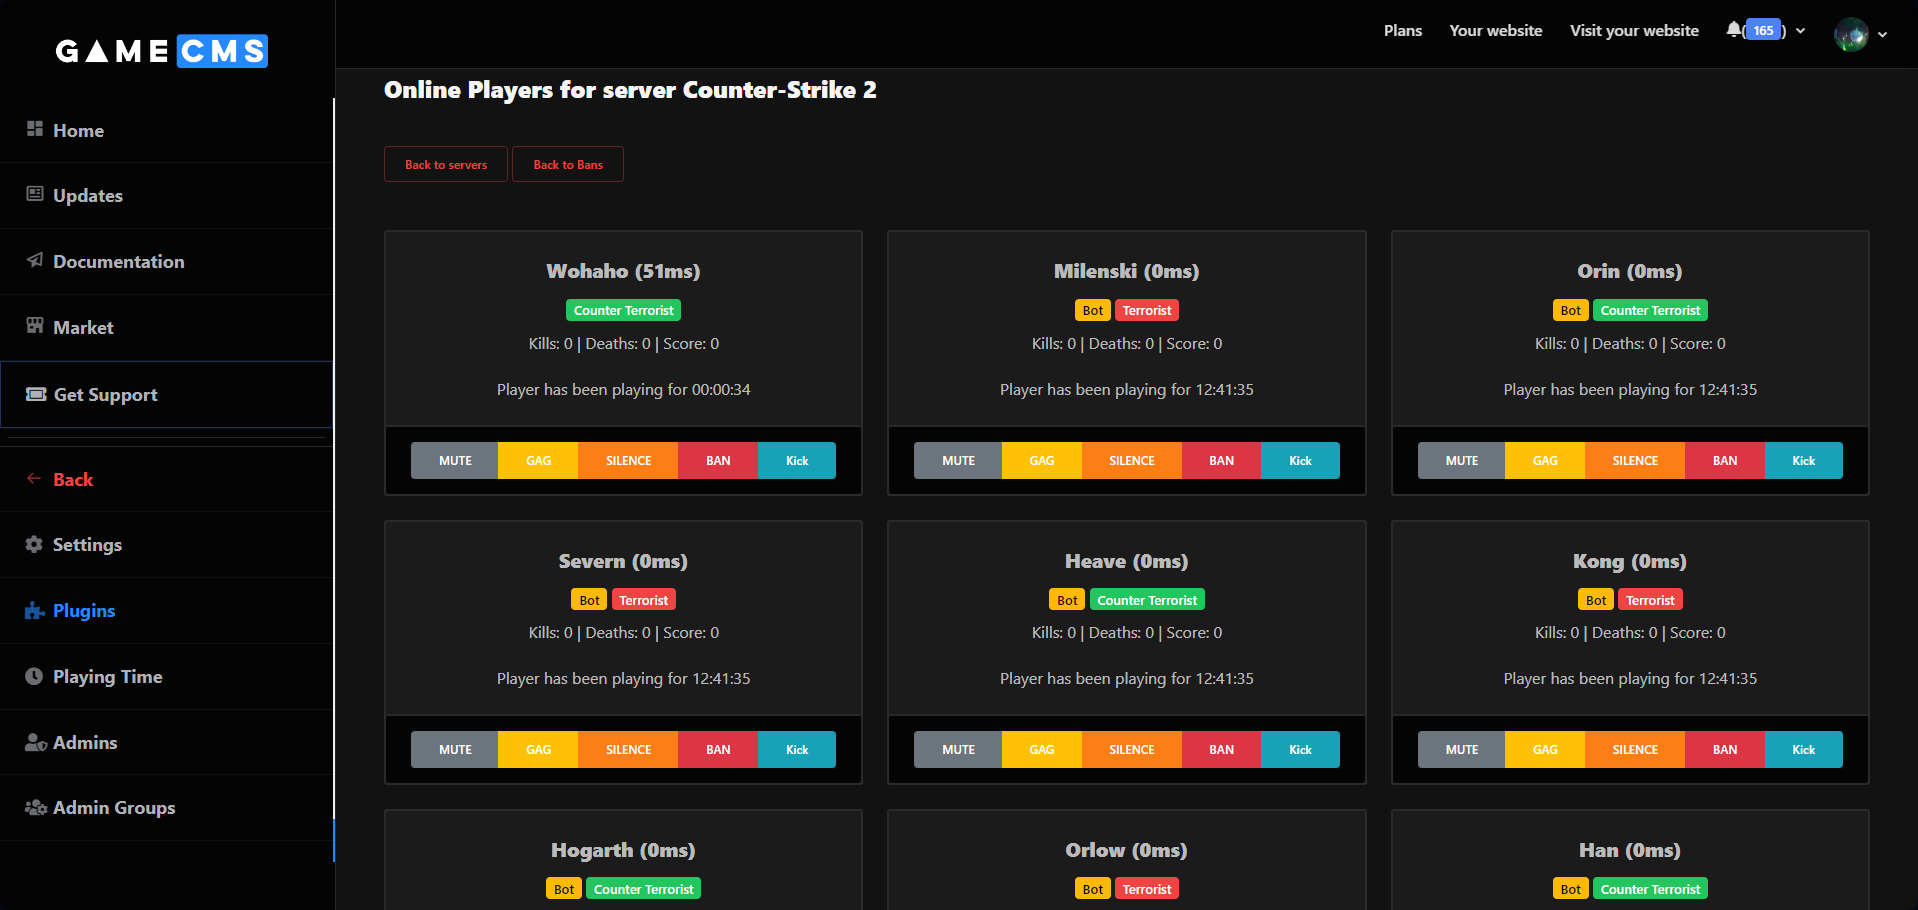
- Manage Online Players: Manage connected players, with options to gag, mute, and more.
- Player Lookup: Search for players and manage them within Zenith Bans, including adding flags or groups.
The platform support Simple Admin also, and the look is exactly the same.
Example Interfaces